
How to Choose Photovoltaic Wire Size Correctly?
Views: 0 Author: Site Editor Publish Time: 2026-08-04 Origin: Site


Incorrect wire sizing acts as a hidden bottleneck in solar installations. It restricts energy yields. It accelerates insulation degradation. It also introduces severe thermal hazards to your arrays. Relying on generic AWG (American Wire Gauge) charts is often a gamble. We need a precise, compliance-driven framework instead. You must select the exact specification required for your specific layout, distance, and load.
Oversizing cables unnecessarily inflates your project costs. Conversely, undersizing them creates systemic failure risks. Our goal is optimized efficiency. We build this on empirical electrical formulas rather than guesswork. Throughout this guide, you will learn how to balance ampacity limitations against voltage drop over distance. You will also see how environmental factors directly impact safe current thresholds.
Precision in sizing your photovoltaic wire defines the line between a robust solar investment and a hazardous liability. We will explore material choices, essential formulas, and strict National Electrical Code (NEC) standards to ensure your system operates flawlessly for decades.
Key Takeaways
Wire sizing is dictated by a strict balance of maximum system current (Ampacity) and acceptable voltage drop over distance (Targeting <3%).
Environmental variables (temperature ratings, UV exposure) are just as critical as gauge size in ensuring long-term operational stability.
Material selection between copper and aluminum fundamentally shifts both the cost structure and the required physical footprint of your installation.
Strict adherence to UL 4703 and NEC compliance ensures commercial viability, insurability, and safety.
Why Photovoltaic Wire Sizing Defines System ROI and Safety
Wiring acts as the circulatory system of your solar array. If you restrict the flow, the entire network suffers. Sizing these lines correctly is not just a best practice. It is a fundamental requirement for safety and return on investment.
Thermal Dynamics & Fire Hazards
Undersized wires create dangerous levels of electrical resistance. When current pushes through a constricted conductor, the friction generates heat. This thermal buildup directly attacks the wire insulation. Over time, constant heating and cooling cycles make the protective jacketing brittle. Brittle insulation cracks easily. These cracks expose bare conductors to moisture and surrounding materials. Exposed conductors often lead to electrical arcing. Arcing presents a massive fire hazard, especially on dry rooftops or in dense commercial installations. Selecting the correct gauge prevents this dangerous heat generation.
The Voltage Drop Penalty
Electrical resistance carries a steep financial cost. As direct current travels through a circuit, a certain amount of voltage naturally dissipates. We call this a voltage drop. If this drop exceeds 3%, you face perpetual energy waste. Imagine losing 5% of your daily generated power before it even reaches the inverter. Over the 25-year lifespan of a standard solar installation, this small daily loss compounds into thousands of lost kilowatt-hours. Correct sizing keeps this drop strictly below the 3% threshold. It ensures your panels deliver maximum usable energy.
Component Compatibility
Implementation realities dictate strict sizing rules. Solar circuits must physically terminate at inverters, charge controllers, and MC4 connectors. Mismatched sizing causes severe mechanical stress at these junction points. If you force an oversized cable into a standard MC4 connector, you risk damaging the weatherproof seal. If you terminate an undersized cable in a massive inverter lug, you create a loose connection. Loose connections cause micro-arcing. You must match the conductor size to the physical limitations of your hardware to ensure a durable, weather-tight system.
The Two-Pillar Evaluation: Ampacity and Voltage Drop
Selecting the right gauge requires evaluating two separate constraints. First, the conductor must safely carry the maximum expected current. We call this ampacity. Second, the conductor must deliver that current without excessive voltage loss over its physical distance.
Calculating Maximum Current (Ampacity)
You cannot use the baseline operating current to size solar circuits. Solar arrays often experience temporary surges due to edge-of-cloud effects or high irradiance days. Therefore, we use a strict multiplier protocol.
Find the Short Circuit Current: Check your solar panel datasheet for the Isc (Short Circuit Current) value. This represents the absolute maximum amperage the panel can produce under standard test conditions.
Apply the Safety Factor: NEC mandates a continuous load safety factor for solar circuits. You must multiply the Isc by 1.25 to account for continuous operation. Then, you multiply by another 1.25 to account for potential over-irradiance. This equals a standard 1.56 multiplier. If your panel has an Isc of 10A, your circuit must safely handle at least 15.6A (10A x 1.56).
Match to AWG Charts: Take this final amperage requirement and match it against standard AWG temperature rating charts. Always use the 90°C column for solar applications to ensure thermal headroom.
Factoring in Distance (Voltage Drop Formula)
Ampacity only solves half the problem. A wire might safely carry 20 amps, but if the run is 150 feet long, the voltage drop might cripple the system.
The Standard Formula: You calculate this loss using a specific equation.
Voltage Drop = (Current × Length × Wire Resistance) / System Voltage.Define the Length: "Length" always means the total round-trip distance of the circuit. If your array is 50 feet from the inverter, the circuit length is 100 feet. The current must travel to the inverter and back along the negative return line.
Target Thresholds: Commercial and high-end residential systems strictly limit this drop to 2-3%. Higher resistance forces the inverter to work harder. It also lowers the overall voltage entering the charge controller, potentially pushing it out of its optimal operating window.
AWG Size | Typical 90°C Ampacity (Amps) | Resistance (Ohms per 1000 ft) | Common Application |
|---|---|---|---|
12 AWG | 30A | 1.98 | Short string runs, low current microinverters |
10 AWG | 40A | 1.24 | Standard residential string wiring |
8 AWG | 55A | 0.78 | Long residential runs, combiner box outputs |
6 AWG | 75A | 0.49 | Commercial sub-arrays, battery banks |
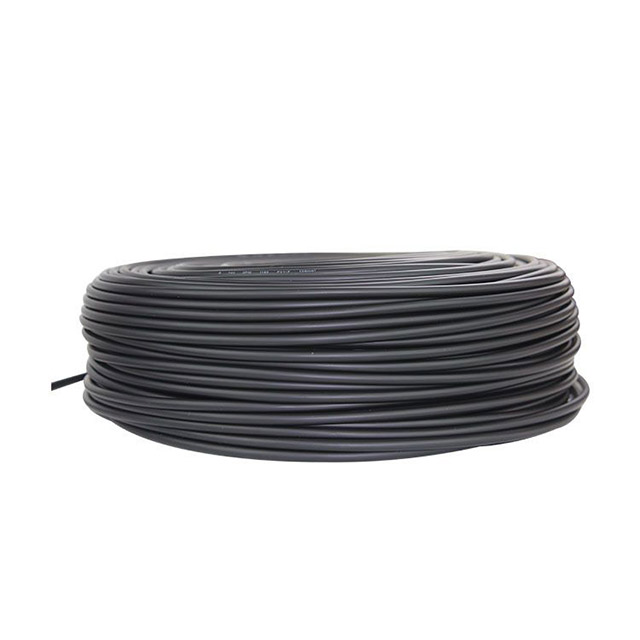
Copper vs. Aluminum: Strategizing Power Cable Materials
Once you determine the electrical requirements, you must choose a conductor material. This decision fundamentally impacts your physical routing strategy and project budget. You must evaluate copper and aluminum based on the specific scale of your installation.
The Copper Standard
Copper serves as the default choice for residential properties and complex roof layouts. It offers superior electrical conductivity compared to aluminum. Because of this high conductivity, you can use a smaller gauge wire to carry the same amount of current. Smaller wires offer much better flexibility. You need this flexibility when routing cables through tight conduit bends or crowded junction boxes. Copper also oxidizes less aggressively than aluminum. This makes terminations simpler and reduces long-term maintenance requirements.
The Aluminum Advantage for Scale
Utility-scale projects or heavy commercial setups often require different strategies. Copper becomes prohibitively expensive over massive distances. This is where aluminum excels. When strategizing your power cable layout for a ground-mounted mega-array, aluminum provides massive budget relief.
Controlling CAPEX: Aluminum costs significantly less than copper by weight. For long DC feeder runs from combiner boxes to central inverters, swapping to aluminum drastically lowers upfront capital expenditure.
Industrial Solutions: Modern alloys eliminate the brittleness of older aluminum wiring. Utilizing specific industrial solutions like the PV1500DC-AL DC Aluminum Cable for Photovoltaic System provides a lightweight, highly efficient alternative. These specialized cables easily handle long-distance DC transmission without burying the project budget.
Implementation Risk: You cannot treat aluminum exactly like copper. You must use AL-CU rated lugs (bi-metallic connectors) when terminating aluminum cables. You must also apply anti-oxidant joint compounds to every stripped end before crimping. Failing to do so causes galvanic corrosion. This corrosion creates high resistance points and eventually leads to terminal failure.
Verifying Insulation, Environment, and NEC Compliance
Conductor size means nothing if the surrounding insulation fails. Solar environments expose wiring to extreme conditions. You must verify that your selected materials meet strict environmental and regulatory standards.
The UL 4703 Standard
Standard building wire (like THHN) or automotive wire fails rapidly outdoors. You cannot use them for exposed solar runs. Dedicated solar wiring must carry a UL 4703 certification. This standard mandates cross-linked polyethylene (XLPE) insulation. This specific material provides extreme UV resistance. It stops the sun from degrading the jacket over decades. It also offers exceptional moisture tolerance and passes strict impact testing. Many UL 4703 cables are rated for direct burial. This allows you to trench lines from a ground mount without running continuous conduit.
Temperature Derating Realities
Wire ampacity charts assume an ambient temperature of 30°C (86°F). Solar panels rarely operate in such mild conditions.
Ambient Heat Reduction: High ambient roof temperatures physically reduce a wire's safe carrying capacity. As the surrounding air gets hotter, the wire cannot dissipate its internal heat as efficiently.
Applying NEC Factors: You must apply NEC temperature correction factors. If your roof reaches 60°C (140°F) in summer, you must multiply your baseline ampacity by a derating factor (often 0.71 for 90°C rated wire). A wire rated for 40 amps at 30°C might only safely carry 28 amps at 60°C. You often need to bump up one gauge size just to account for summer heat.
Voltage Ratings
Insulation thickness dictates the maximum allowable system voltage. Older residential systems commonly used 600V rated insulation. Modern string inverters now routinely wire panels in long series strings to maximize efficiency. Stringing panels in series adds their voltages together. This pushes total string voltages up to 1000V for residential and up to 1500V for commercial installations. You must verify that your cable insulation carries a rating equal to or higher than your maximum system open-circuit voltage. Using a 600V cable on a 1000V string violates NEC codes and risks catastrophic dielectric breakdown.
Shortlisting Logic: A Step-by-Step Sizing Protocol
We recommend following a rigid, step-by-step protocol. This eliminates guesswork. It ensures you account for every variable before purchasing bulk spools.
Step 1: Audit Panel Specs. Pull the manufacturer datasheet for your exact solar panels. Extract the Short Circuit Current (Isc) and the Open Circuit Voltage (Voc). You need these specific numbers for your baseline math.
Step 2: Map the Run. Measure the exact physical routing distance from the array to the charge controller or inverter. Multiply this by two to get your round-trip circuit length. Add 10% extra for necessary slack, drip loops, and termination ends.
Step 3: Apply the Math. Run the 1.56x ampacity multiplier on your Isc. Next, calculate the voltage drop using your measured round-trip length. Find the minimum AWG size that satisfies both the ampacity requirement and keeps the voltage drop under 3%.
Step 4: Cross-Reference Conditions. Evaluate your installation environment. Are the wires sitting on a hot asphalt roof, or are they buried underground from a shaded ground mount? Apply the necessary NEC temperature derating multipliers based on these conditions. Upsize the gauge if the derated ampacity falls below your requirement.
Step 5: Select the Gauge and Material. Finalize your required AWG size. Decide between standard copper for tight, short runs or specialized aluminum alternatives for long-distance ground mounts based on your physical constraints and budget. Ensure the final choice carries the proper UL 4703 certification and voltage rating.
Common mistakes often occur during Step 4. Installers frequently forget to derate for temperature, leading to systems that pass inspection in the winter but trip breakers or overheat during peak summer production. Always calculate for worst-case environmental conditions.
Conclusion
Precision in sizing photovoltaic conductors is a non-negotiable step for long-term system efficiency and safety compliance. We cannot overstate the dangers of thermal hazards and the financial penalty of excessive voltage drops. By diligently calculating your maximum current, rigorously factoring in round-trip distance, and applying necessary environmental derating multipliers, you build a resilient energy system.
Never rely on estimations. As a clear next step, we strongly recommend consulting a dedicated voltage drop calculator tailored specifically to your local NEC codes. Once you verify your exact gauge requirements, reach out to a certified supplier. Verify their inventory for your specific project dimensions, especially if you are sourcing specialized 1500V DC rated cables or industrial aluminum solutions. Taking these deliberate steps ensures your solar investment operates safely and efficiently for its entire design life.
FAQ
Q: Can I use regular building wire instead of specific photovoltaic wire?
A: No. Regular building wire like THHN lacks adequate UV protection and weatherproofing. Sunlight quickly degrades standard jackets, causing them to crack and expose live conductors. Photovoltaic wire requires UL 4703 certification, ensuring thicker cross-linked insulation designed specifically for direct sunlight, extreme temperatures, and outdoor moisture tolerance.
Q: Does a 12V system require thicker wire than a 48V system?
A: Yes, absolutely. There is an inverse relationship between voltage and amperage to deliver the same wattage. A 12V system pushes four times the amperage of a 48V system for the exact same power load. Higher amperage demands much thicker wire to prevent severe voltage drop and dangerous overheating.
Q: How do I connect thick aluminum PV cable to standard solar components?
A: You cannot connect aluminum directly to standard copper-rated components. You must use step-down splicing blocks or specific bi-metallic (AL-CU rated) connectors. Additionally, you must generously apply anti-oxidant compound to the bare aluminum strands before crimping to prevent galvanic corrosion and ensure a stable connection.
Q: What happens if my voltage drop is 5% instead of 3%?
A: A 5% voltage drop causes perpetual energy waste. It dissipates your generated solar power as heat in the wiring. Over decades, this translates to massive long-term wattage loss. Additionally, it lowers the voltage reaching the inverter, which can cause annoying clipping issues or push charge controllers out of optimal tracking ranges.


